
Terracotta clay planters and pots have been a staple of gardening and home decor for centuries. Derived from the Italian words for baked earth, terracotta offers a warm, rustic aesthetic that instantly grounds any interior or exterior space. Beyond their timeless visual appeal, these unglazed earthenware vessels are highly functional. Their porous nature allows soil to breathe and excess moisture to evaporate, making them an exceptionally healthy choice for a wide variety of houseplants, herbs, and outdoor specimens.
While the classic, natural orange-brown hue of traditional clay pots is undeniably charming, these versatile vessels also serve as the perfect blank canvas for creative customization. Whether you are an avid DIY enthusiast looking to personalize your plant collection or a design-conscious homeowner aiming to elevate your living space, there are countless ways to transform basic clay pots into stunning decorative statements. From modern minimalist paint techniques to intricate mosaic applications, this comprehensive guide explores ten creative ideas to decorate your home and garden using terracotta clay planters.
1. Hand-Painted Geometric Color Block Pots
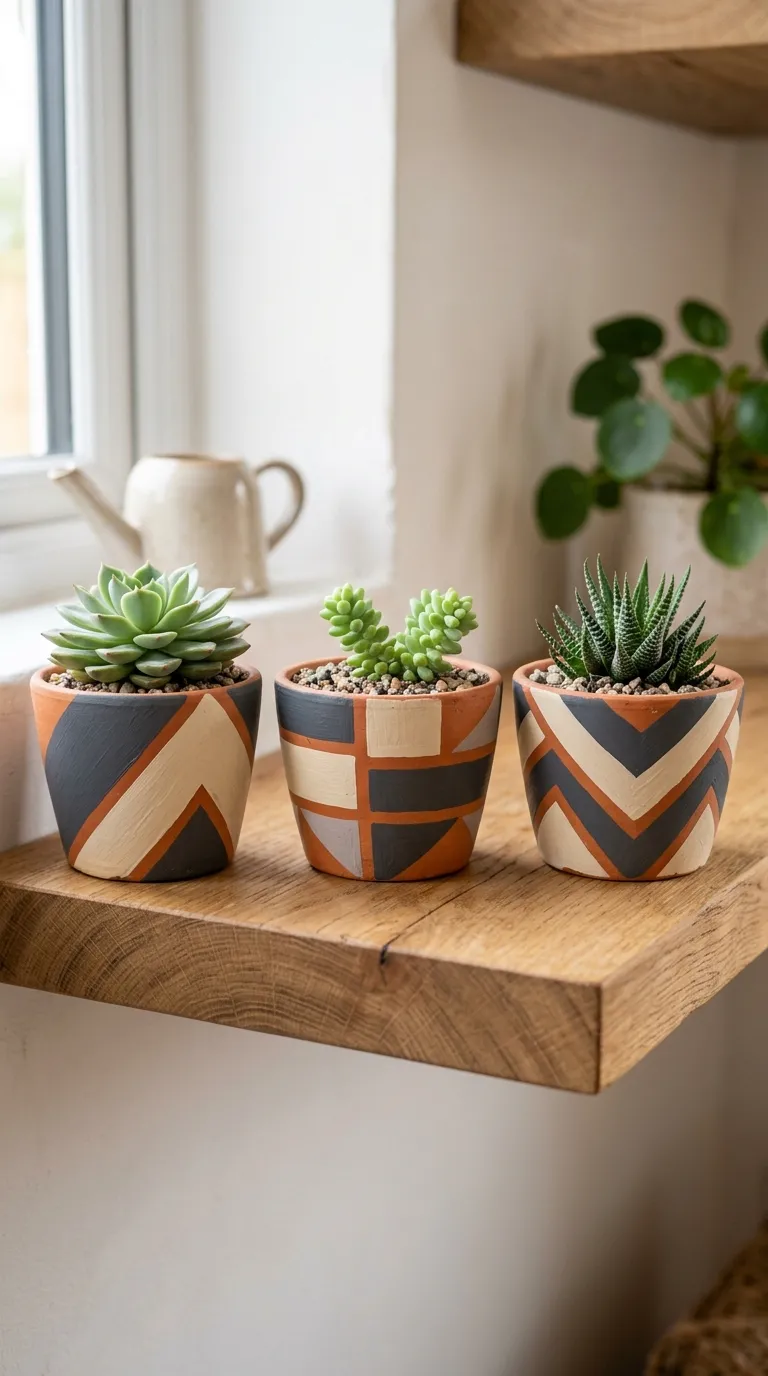
One of the most effective ways to modernize traditional terracotta clay planters is by applying a bold, geometric color-blocked design. This style bridges the gap between mid-century modern aesthetics and contemporary minimalism. By pairing the natural, earthy texture of the exposed clay with crisp, clean lines and contrasting paint colors, you can create a striking visual dynamic that highlights both the plant and its container.
To achieve this look, start by thoroughly cleaning and drying your terracotta pot. Use high-quality painter’s tape to section off precise geometric shapes, such as triangles, diagonals, or sharp horizontal bands. For a sophisticated color palette, consider combining muted neutrals like charcoal grey, soft cream, and sage green with sections of the raw, unpainted terracotta. Apply two to three thin coats of acrylic or outdoor-grade patio paint to ensure vibrant, even coverage. Once the paint is completely dry, carefully peel away the tape to reveal sharp, clean edges. To protect your handiwork from moisture and UV damage, apply a clear, water-resistant matte sealer over the entire exterior of the pot.
2. Distressed Whitewash and French Country Chic
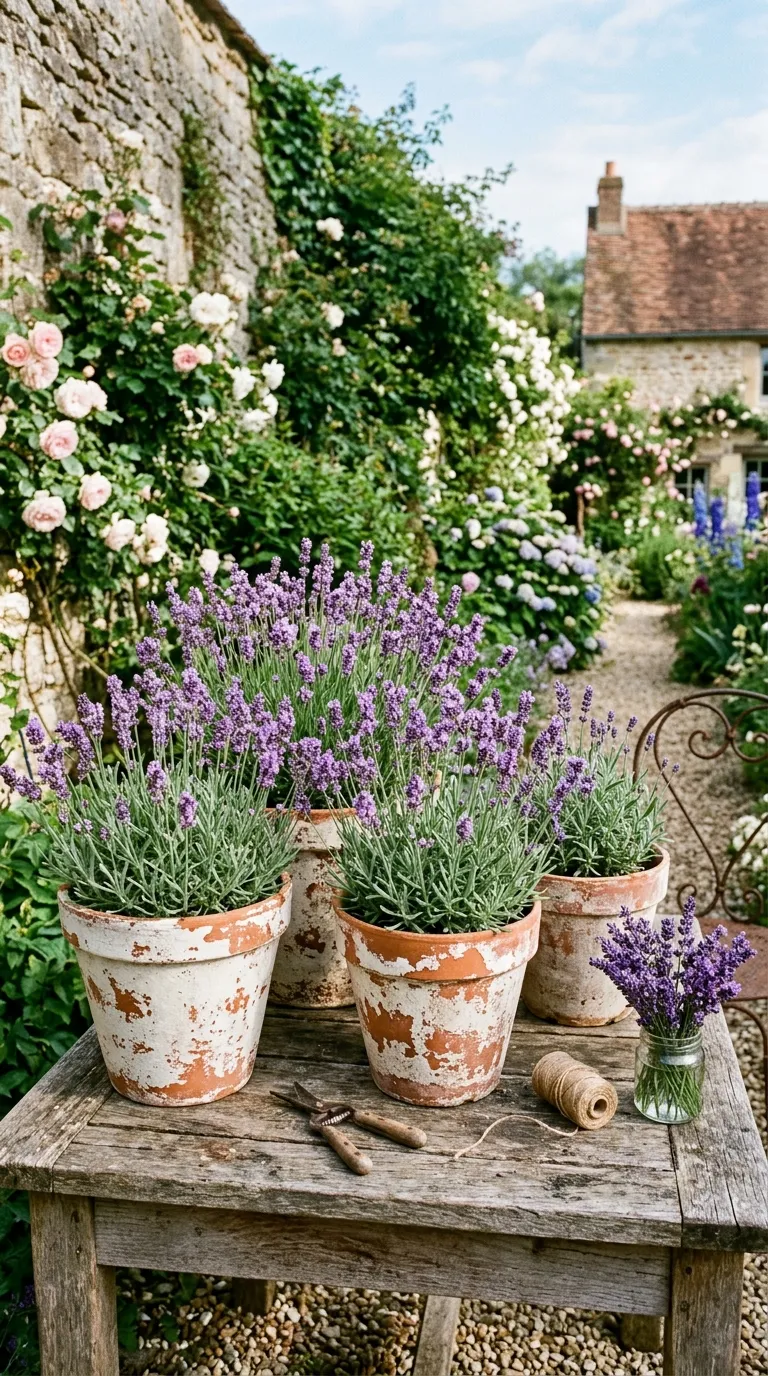
If your home decor leans toward rustic farmhouse, vintage, or French country chic, a distressed whitewash technique is the perfect way to soften the bright orange tones of new terracotta. This method mimics the natural, aged patina that clay pots develop over years of exposure to the elements, giving your planters an instant sense of history, character, and vintage charm.
Creating a whitewashed effect is surprisingly simple and highly forgiving. Mix equal parts of white acrylic or latex paint with water to create a thin, translucent glaze. Using a dry paintbrush or a damp rag, apply the watery mixture onto the exterior of the pot in loose, uneven strokes. Before the paint dries completely, use a clean, dry cloth to gently wipe away excess paint from the raised surfaces, allowing the warm terracotta color to show through in patches. For an even more authentic, weathered look, you can use a fine-grit sandpaper to scuff up the edges and rim of the pot after the whitewash has dried. This technique works beautifully when paired with delicate, romantic plants like lavender, English ivy, or soft green ferns.
3. Bohemian Macrame Hanging Clay Planters
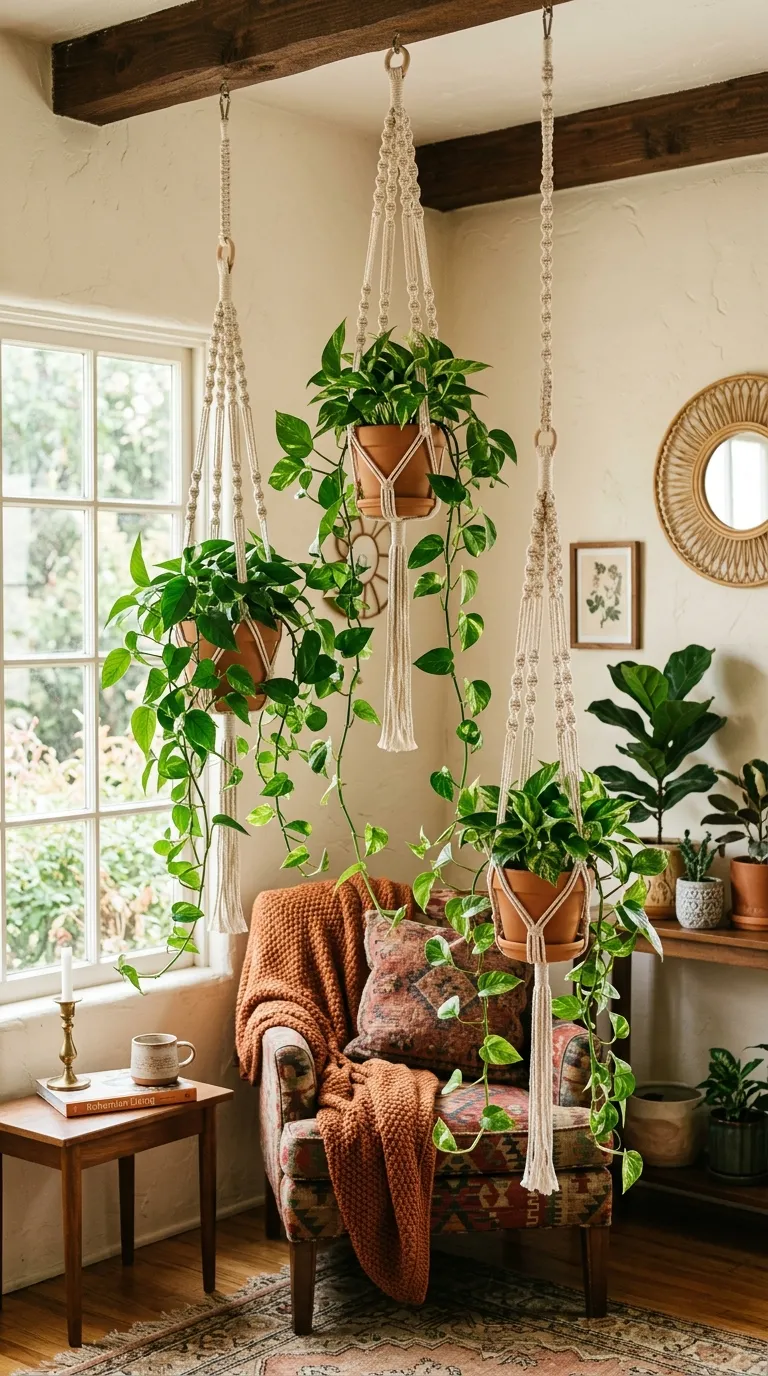
Embrace a relaxed, bohemian vibe by elevating your terracotta pots off the ground and suspending them in hand-knotted macrame plant hangers. Hanging planters are an excellent solution for maximizing vertical space, keeping delicate plants away from curious pets, and adding layers of visual interest to empty corners, window frames, or covered patio areas.
The natural, textured fibers of cotton, jute, or hemp macrame cords complement the organic, earthy feel of terracotta beautifully. You can purchase pre-made hangers or craft your own using basic knotting techniques like the square knot and spiral half-knot. To create a cohesive boho display, select small to medium-sized terracotta pots and plant them with trailing or cascading houseplants, such as pothos, string of pearls, or heartleaf philodendron. As the vines grow and drape over the warm clay rims, they create a lush, living sculpture that brings warmth and movement to any room in your home.
4. Metallic Accents and Gold Leaf Detailing
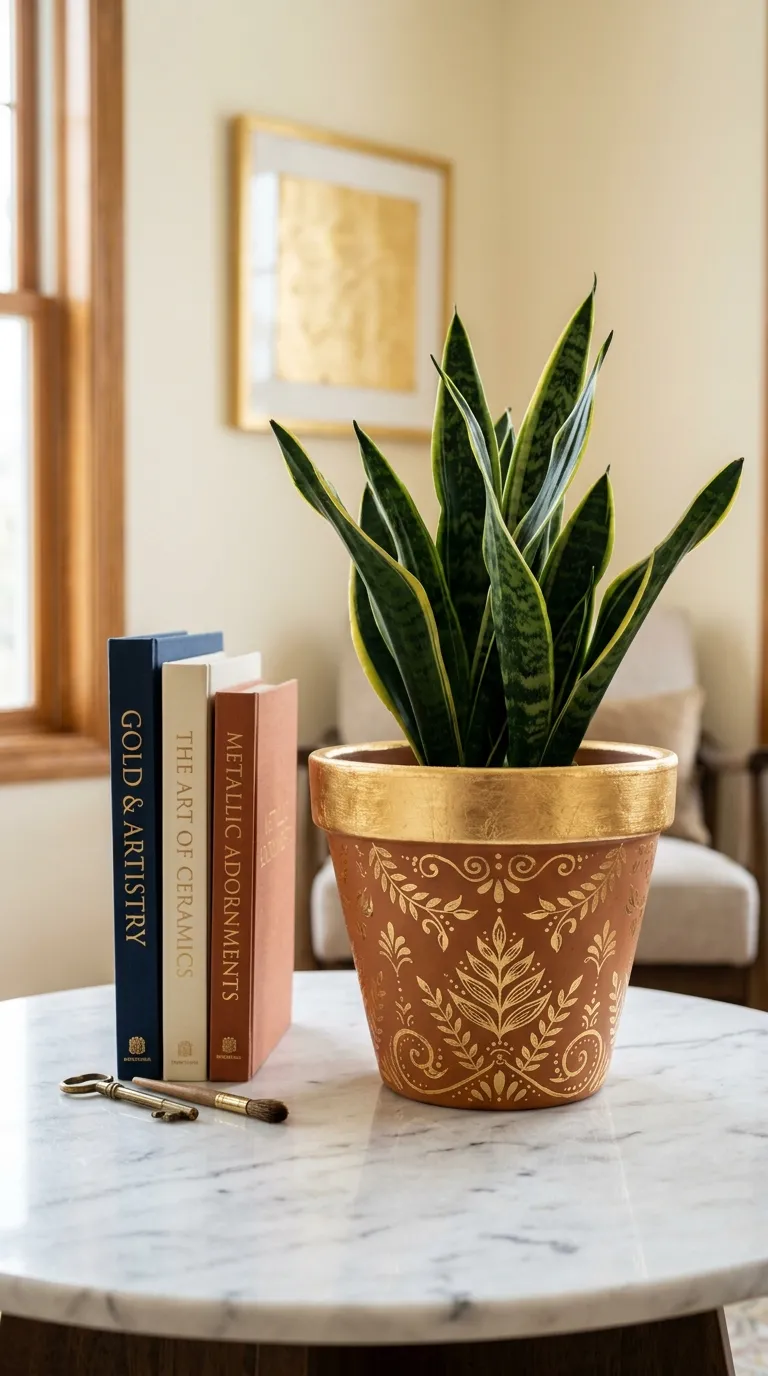
For those who wish to add a touch of sophistication, glamour, and luxury to their indoor garden, decorating terracotta pots with metallic accents is an exceptional choice. The contrast between the rough, matte texture of raw clay and the shimmering, reflective quality of gold, silver, or copper leaf creates an upscale, artisanal look that elevates any shelf or tabletop.
To apply gold leaf, apply a thin layer of specialty metal leaf adhesive, often called size, to the specific areas of the pot you wish to gild. Let the adhesive sit for a few minutes until it becomes tacky. Carefully lay sheets of gold, copper, or silver leaf onto the tacky areas, using a soft, dry makeup brush to gently press the delicate metal sheets into the crevices of the clay. Once the adhesive is dry, use the brush to sweep away any excess loose leaf. Alternatively, you can use metallic paint pens or high-quality metallic acrylics to paint elegant stripes, delicate metallic rims, or intricate celestial patterns directly onto the terracotta surface. Always seal the finished product to prevent the metal leaf from tarnishing over time.
5. Intricate Mosaic Tile and Broken China Art
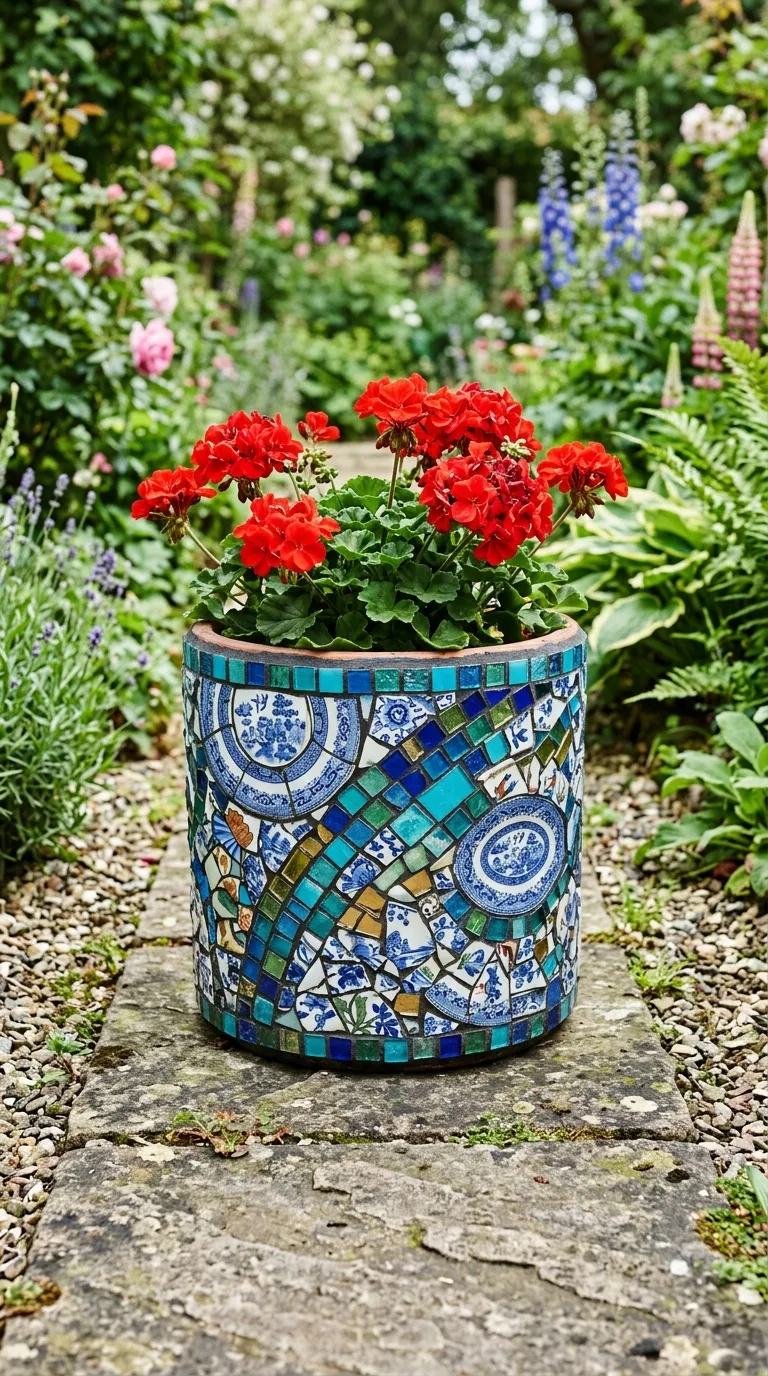
Transforming a plain clay pot into a detailed mosaic masterpiece is a wonderful way to recycle broken ceramic dishes, colorful glass beads, or leftover tiles while creating a durable, eye-catching piece of functional garden art. This technique adds substantial texture, weight, and vibrant color to your planters, making them perfect focal points for outdoor garden beds, patios, or entryways.
To begin your mosaic project, collect colorful materials such as broken porcelain plates, stained glass pieces, flat glass marbles, or small ceramic tiles. Use a strong, waterproof adhesive to glue the individual mosaic pieces onto the exterior of the terracotta pot, leaving small gaps between each piece. Once the adhesive has fully cured, mix a batch of sanded tile grout and spread it over the entire surface, pressing it firmly into the gaps. Use a damp sponge to carefully wipe away any excess grout from the faces of the tiles before it hardens. After the grout has dried completely, seal the pot with a penetrating grout sealer to protect it from moisture and weather, ensuring your vibrant mosaic design remains beautiful for years to come.
6. Decoupage Floral and Botanical Motifs
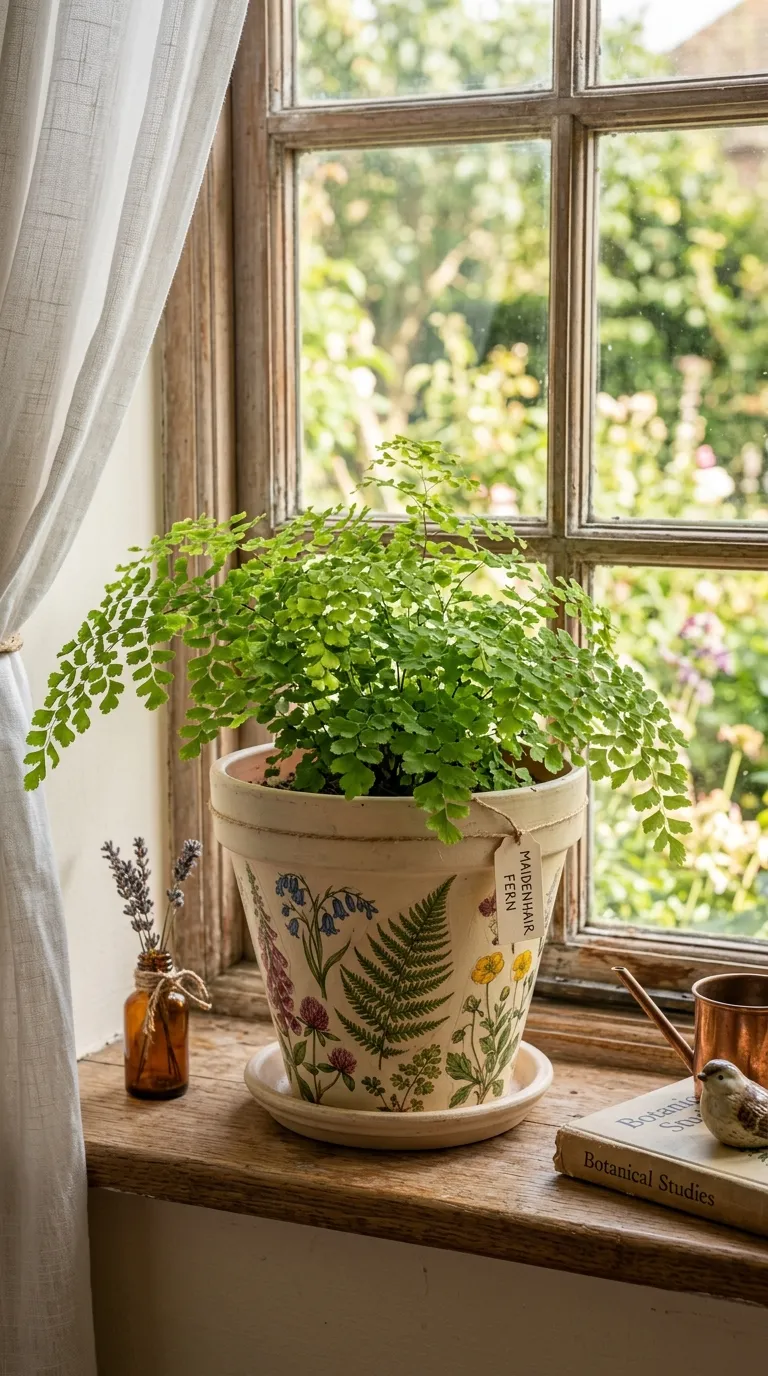
Decoupage is a classic crafting technique that allows you to transfer intricate, highly detailed illustrations onto the surface of terracotta pots without needing advanced painting skills. By using decorative paper napkins, vintage book pages, botanical prints, or wrapping paper, you can customize your planters with romantic florals, vintage illustrations, or whimsical patterns.
To ensure your paper designs pop against the dark background, it is best to start by painting the exterior of your terracotta pot with a solid base coat of white or light cream acrylic paint. Once the base coat is dry, carefully cut out your chosen paper motifs. If you are using decorative napkins, separate the printed top layer from the plain white backing plies. Apply a thin layer of decoupage medium, such as Mod Podge, directly to the painted pot. Gently press the paper cutout onto the wet medium, smoothing out any air bubbles or wrinkles with your fingers or a soft brush. Once dry, apply several thin, protective layers of the decoupage medium over the entire pot to seal the paper and create a durable, water-resistant finish.
7. Coastal Rope Wrapped and Jute Textured Pots
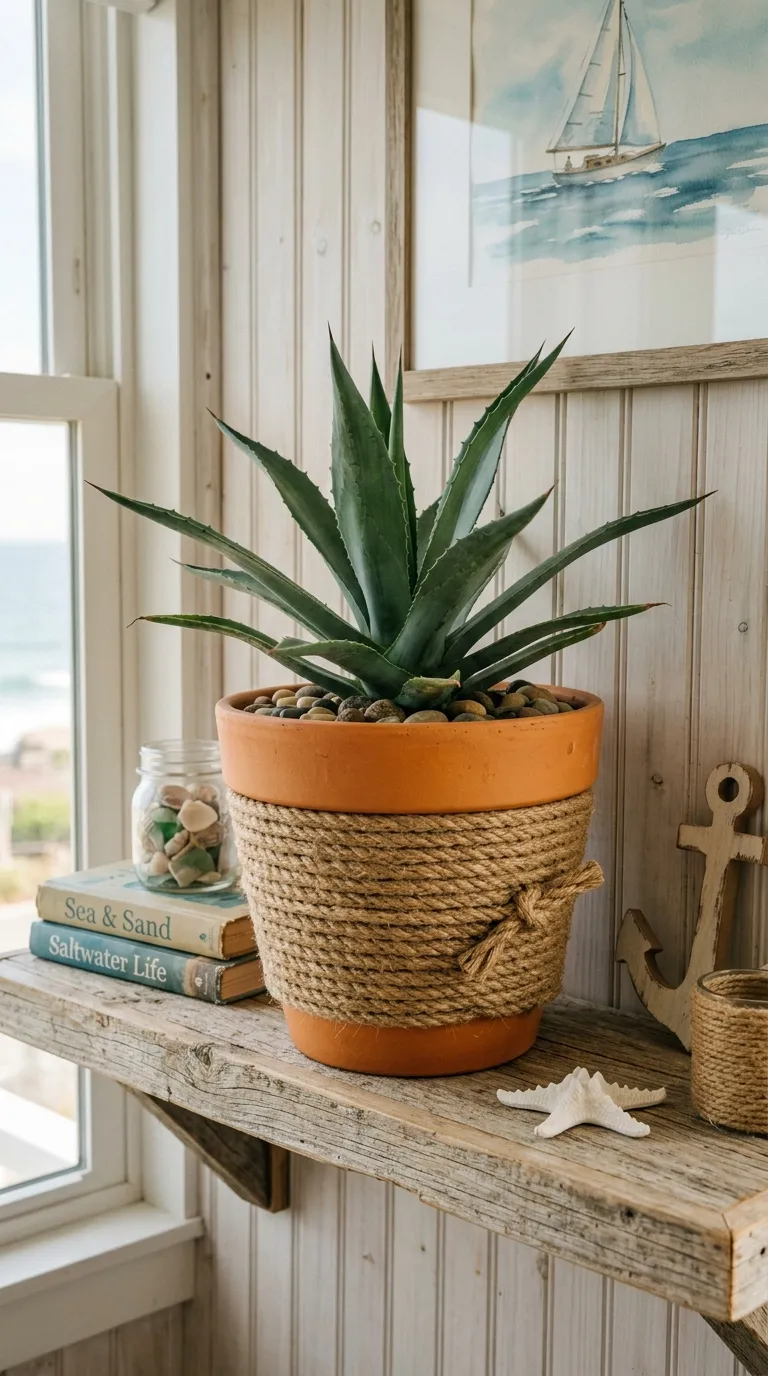
Bring a relaxed, coastal, or nautical aesthetic into your living space by wrapping your terracotta clay planters in natural rope, twine, or jute. This decorative technique emphasizes texture and organic materials, making it a perfect match for beach houses, coastal cottages, or anyone who appreciates a warm, tactile, and natural design style.
To create a rope-wrapped planter, start at either the base or the rim of the pot. Apply a small bead of strong, waterproof hot glue or heavy-duty construction adhesive, and press the end of your natural fiber rope firmly into place. Begin wrapping the rope tightly around the circumference of the pot, applying thin lines of glue periodically to secure the rope as you work your way up or down. You can cover the entire surface of the pot for a uniform, highly textured look, or wrap only the middle section, leaving the classic terracotta rim and base exposed for a lovely contrast of materials. This style looks exceptionally striking when paired with structural plants like snake plants, agaves, or ornamental grasses.
8. Chalkboard Paint for Easy Plant Labeling
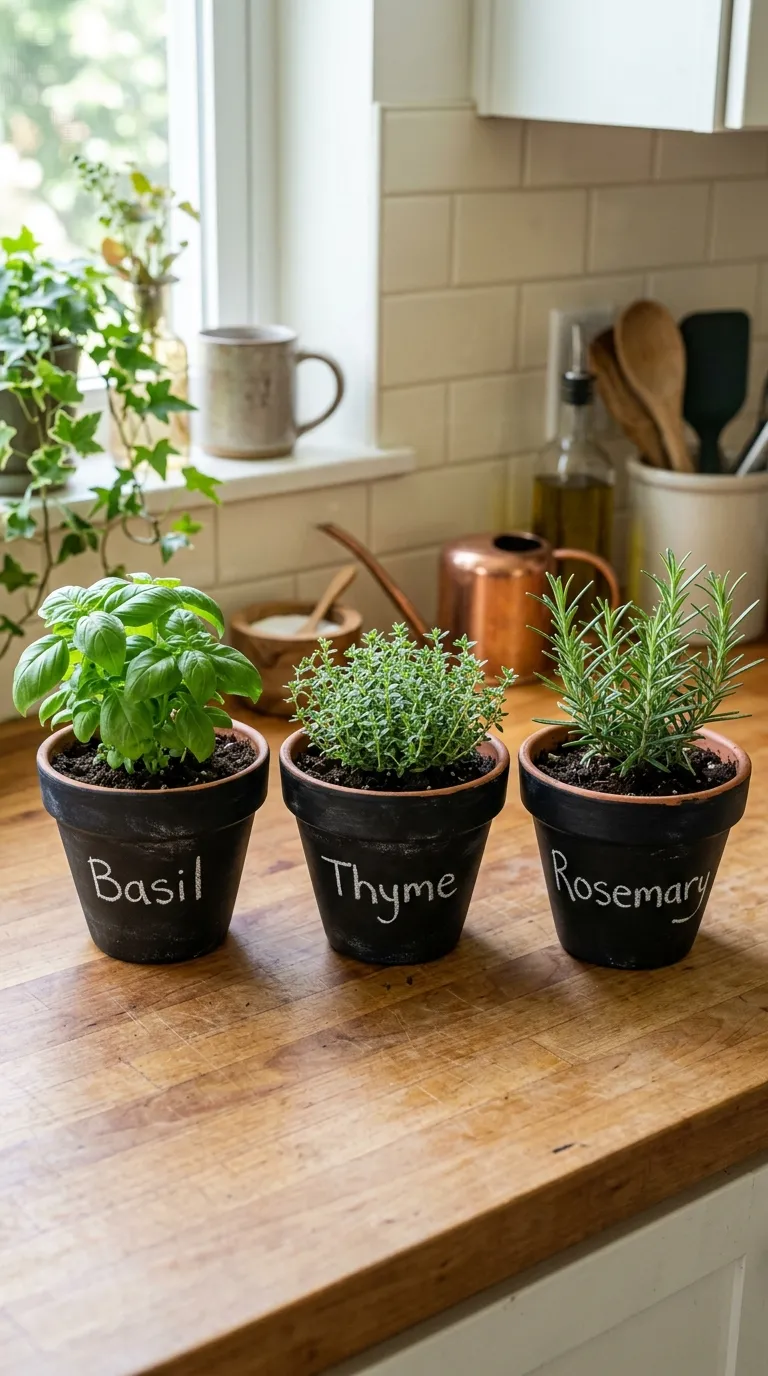
For a highly functional, interactive, and charming addition to your kitchen windowsill or herb garden, consider painting your terracotta pots with chalkboard paint. This clever decorating idea allows you to write directly on the pots with chalk, making it incredibly easy to label your culinary herbs, write fun messages, or keep track of watering schedules.
To prepare your pots, apply two coats of high-quality black or deep green chalkboard paint to the exterior surfaces, allowing the paint to dry completely between coats. Once the final coat has cured, it is important to prime the surface by rubbing the side of a piece of chalk over the entire painted area and then wiping it clean with a dry cloth. This prevents your first written words from leaving permanent ghost images on the paint. You can now use traditional chalk or liquid chalk markers to write the names of your plants, such as rosemary, basil, or thyme, in elegant calligraphy. Whenever you decide to rotate your plants, simply wipe the surface clean with a damp cloth and write a new label.
9. Whimsical Stenciled Mandala and Henna Designs
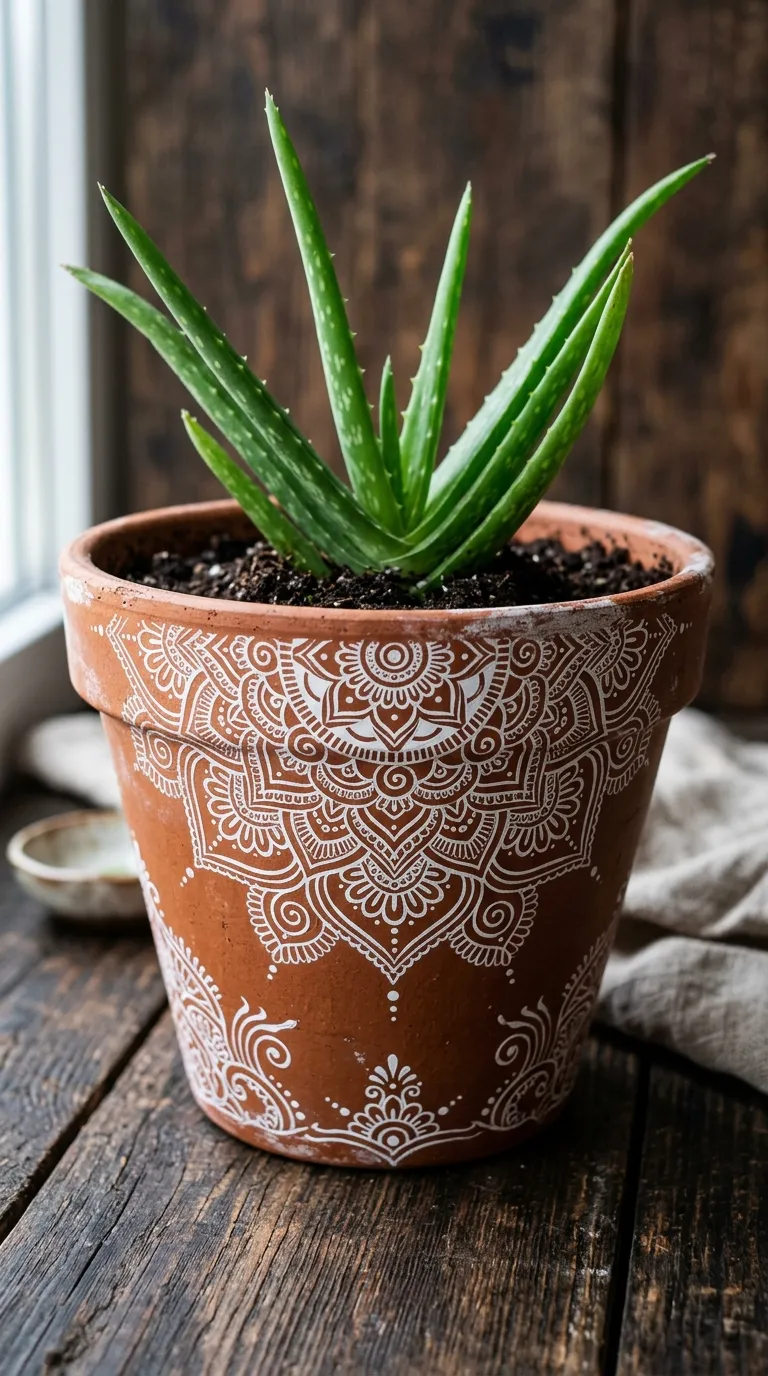
If you love intricate, bohemian patterns but lack the steady hand required for freehand painting, stencils are an outstanding tool for decorating terracotta clay planters. Mandala, henna, and Moroccan-inspired stencils allow you to apply complex, symmetrical, and visually stunning patterns to your pots with absolute precision and ease.
Select a flexible plastic stencil that can easily conform to the curved surface of your clay pot. Secure the stencil firmly in place using low-tack painter’s tape or a temporary spray adhesive. To apply the paint, use a dense foam pouncer or a stencil brush. The key to clean stencil lines is using an incredibly dry brush technique; dip your brush or sponge into acrylic paint, and then dab almost all of it off onto a paper towel before lightly tapping it over the stencil cutouts. This prevents wet paint from seeping underneath the stencil edges. Carefully peel the stencil away while the paint is still slightly damp to reveal a crisp, gorgeous pattern. This style looks beautiful with deep, rich colors like navy blue, teal, or plum painted over a warm terracotta or cream background.
10. Aged Mossy Patina and Terracotta Aging
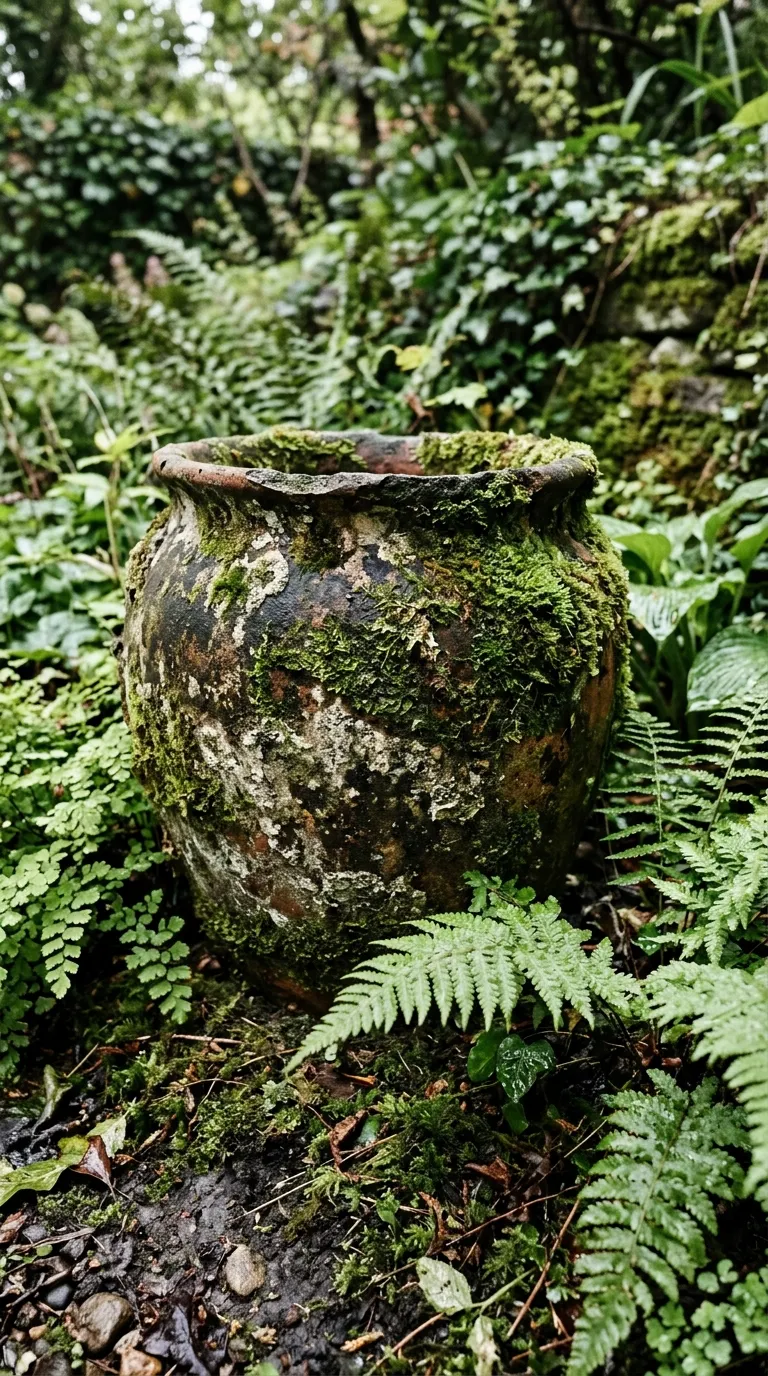
There is an undeniable, romantic beauty to old terracotta pots that have spent decades sitting in a damp, shaded English garden, slowly accumulating layers of green moss, mineral deposits, and weathered textures. If you do not want to wait years for nature to take its course, you can easily accelerate this aging process using simple household ingredients to create an authentic-looking mossy patina.
One popular and highly effective method involves using plain, unsweetened yogurt or buttermilk. Simply brush a thick, generous layer of yogurt or buttermilk over the exterior of your terracotta pot. If you have access to live wild moss, you can blend a handful of it into the yogurt first to jumpstart the biological process. Place the treated pot in a shaded, damp, and humid location in your garden, and mist it regularly with water to keep it moist. Within a few weeks, the natural spores in the air will colonize the porous clay, resulting in a beautiful, living green patina. Alternatively, for an instant, non-living moss effect, you can dab shades of forest green, olive, and mustard yellow acrylic paint onto the pot using a sea sponge, building up layers of color that mimic the organic look of natural moss and lichen.
Conclusion
Terracotta clay planters and pots are far more than just simple containers for your favorite greenery; they are versatile, durable, and highly customizable design elements that can elevate the style of any home or garden. Whether you prefer the clean lines of modern geometric color-blocking, the romantic charm of a distressed whitewash, or the rich texture of a hand-crafted mosaic, these ten ideas offer a starting point for your creative journey. By taking the time to decorate and personalize your clay pots, you can showcase your unique artistic style while providing a healthy, breathable, and beautiful environment for your beloved plants to thrive.