
As the crisp autumn air rolls in and the leaves begin to turn vibrant shades of amber and gold, the anticipation for Halloween starts to build. While we all love the thrill of transforming our homes into haunted sanctuaries, purchasing commercial holiday decorations can quickly drain your wallet. High-end retail stores display gorgeous, spooky setups that come with incredibly steep price tags. Fortunately, you do not need a massive budget to create a memorable, spine-chilling atmosphere. With a little creativity, some basic crafting supplies, and a bit of imagination, you can craft stunning decorations that look professional and uniquely yours.
Embracing a do-it-yourself approach to your seasonal styling allows you to customize every detail to match your personal aesthetic, whether you prefer a classic gothic vibe, a playful family-friendly look, or a genuinely terrifying haunted house experience. By repurposing everyday household items, utilizing dollar store finds, and gathering materials from nature, you can achieve maximum visual impact with minimal financial investment. This comprehensive guide will walk you through ten exceptionally creative, budget-friendly DIY Halloween decor projects that will delight trick-or-treaters and party guests alike without breaking the bank.
1. Floating Witch Hats with Fishing Line
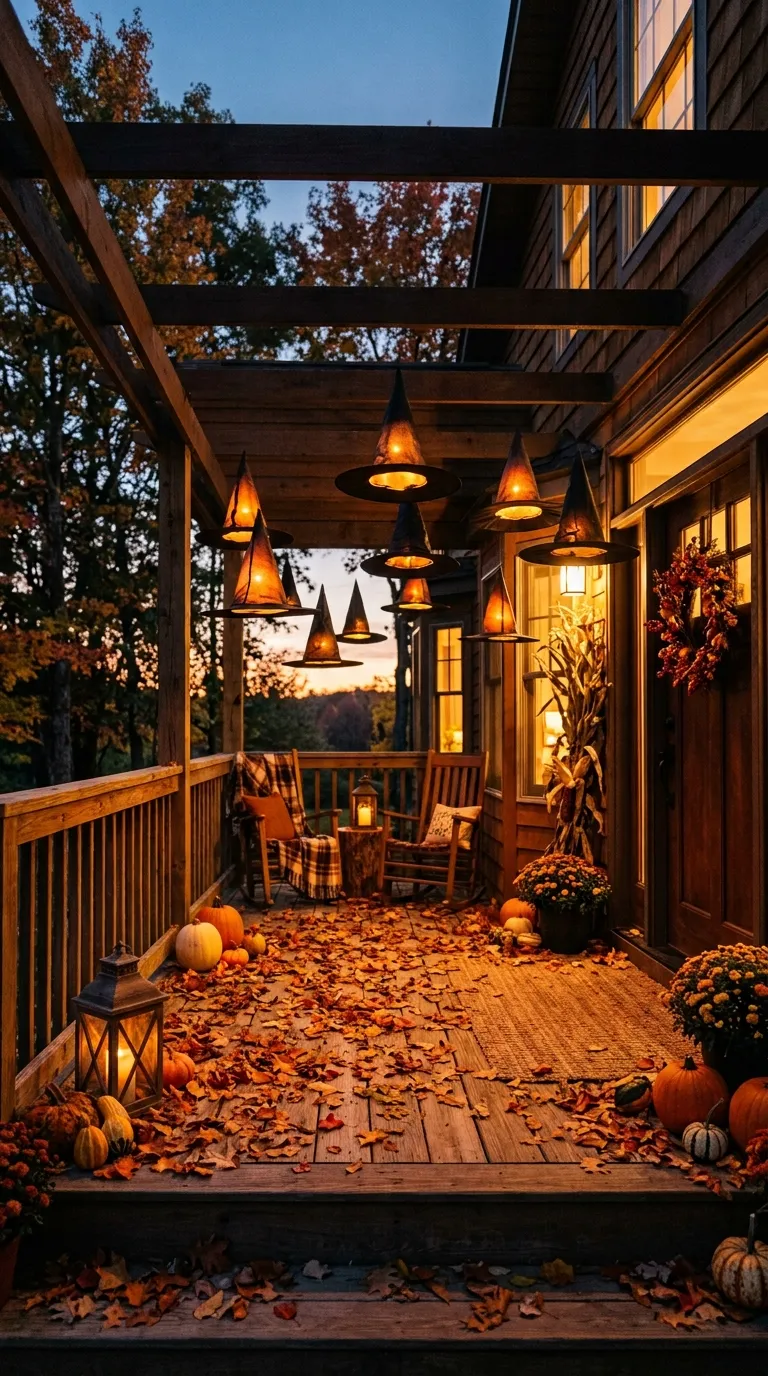
Create an enchanting, magical atmosphere right on your front porch or inside your entryway by hanging classic black witch hats so they appear to float mid-air. This project is inspired by whimsical, gothic fantasy aesthetics and is incredibly simple to execute. To start, purchase inexpensive plastic or felt witch hats from your local dollar store. You will also need a roll of clear, monofilament fishing line, a long hand-sewing needle, and some lightweight, battery-operated LED tea lights or glow sticks.
Using the needle, thread a long piece of fishing line through the very tip of each hat. Tie a secure knot on the underside of the fabric to keep the line from slipping through. If you want your hats to glow eerily after dark, use a small piece of clear tape or safety pins to secure a lightweight LED tea light inside the crown of the hat before hanging it. Tie the other end of the fishing line to ceiling hooks, porch beams, or tree branches. Vary the hanging heights to create a dynamic, floating illusion that sways gently with the autumn breeze.
2. Glowing Plastic Jug Ghost Lanterns
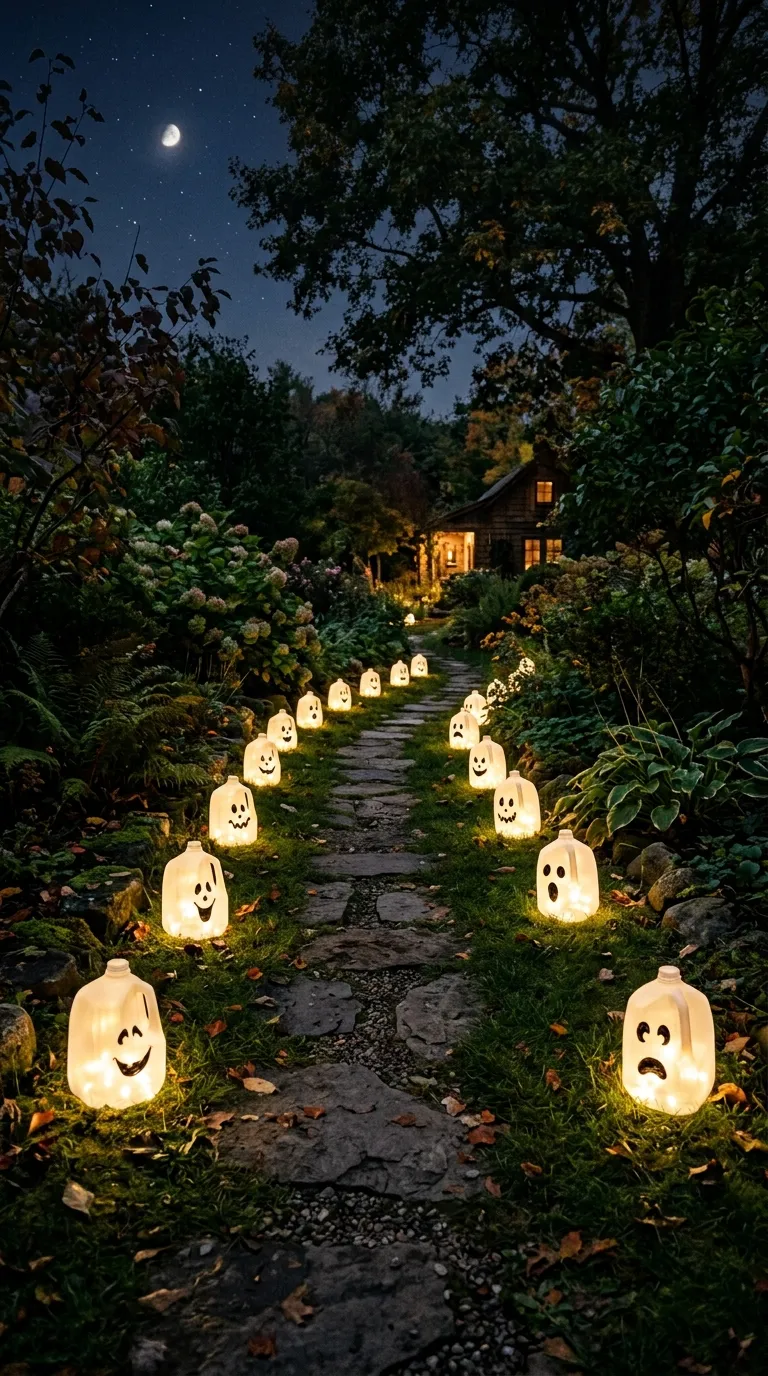
Instead of tossing your empty plastic milk jugs or water containers into the recycling bin, save them to create a charming pathway display of glowing ghost lanterns. This eco-friendly, virtually free DIY project is perfect for illuminating your driveway, walkway, or front steps on Halloween night. Gather several clean, translucent plastic jugs, a black permanent marker, a utility knife, and a string of warm white LED Christmas lights or battery-operated fairy lights.
Start by thoroughly washing and drying the interior of each jug. Use the black permanent marker to draw unique, expressive ghostly faces on the flat side of the jugs opposite the handle. You can design classic spooky faces, happy grins, or surprised expressions. Carefully cut a small, two-inch hole in the back or bottom of each jug using your utility knife. If you are lining them up along a walkway, feed several bulbs from a single outdoor light string through the back hole of each jug. Alternatively, pop a single battery-operated tea light into each container. When night falls, these simple jugs light up to guide your guests with a soft, eerie glow.
3. Gothic Black Lace Mason Jars
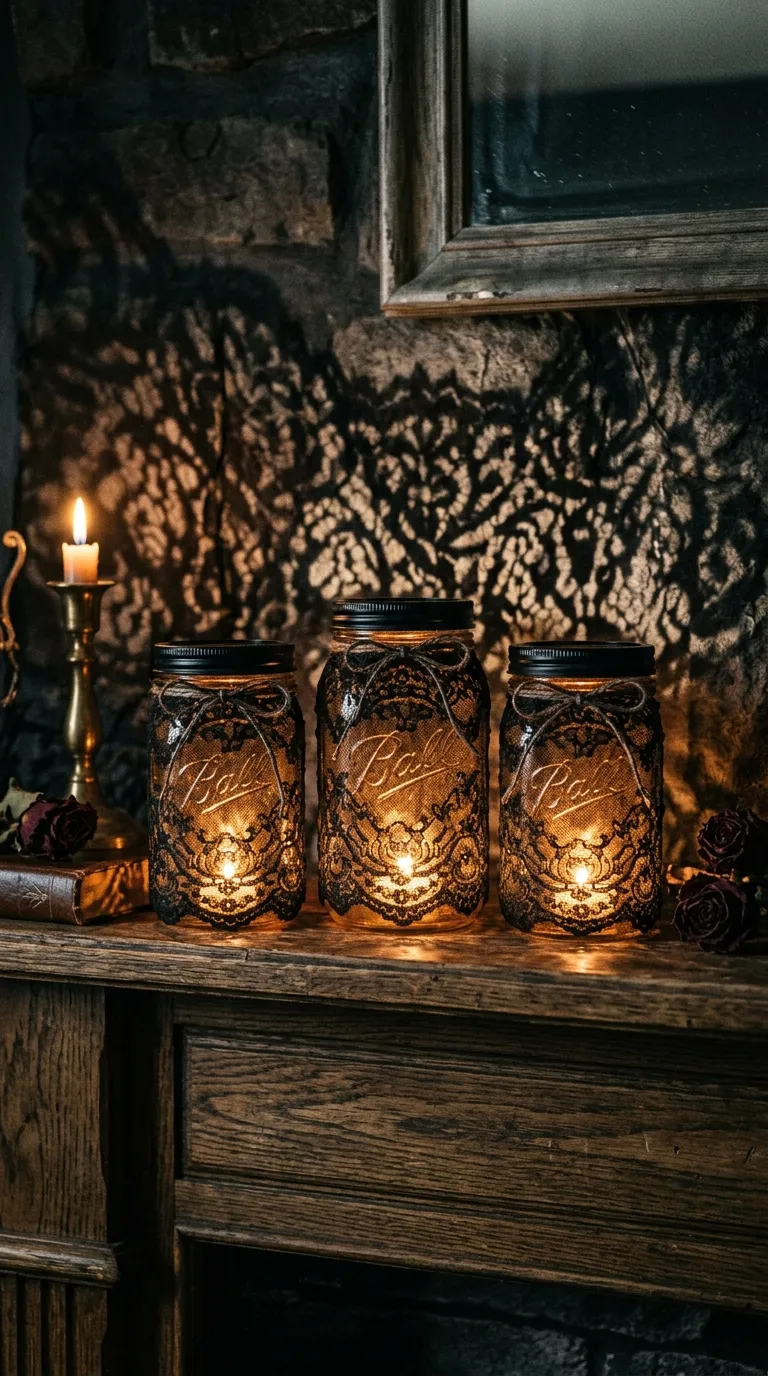
Mason jars are incredibly versatile crafting staples, and with a quick coat of paint or some dark fabric, they can be transformed into elegant, gothic centerpieces. These black lace jars offer a sophisticated, vintage aesthetic that works beautifully on dining tables, fireplace mantels, or windowsills. For this project, you will need a few clean glass jars, a can of matte black spray paint, some scraps of black lace fabric, Mod Podge or craft glue, and a sponge brush.
There are two primary ways to style these jars. The first method is to wrap a strip of intricate black lace around a clear glass jar, securing it tightly with craft glue. When you place a candle inside, the light flickers beautifully through the delicate patterns of the lace. The second method involves placing lace over the jar as a stencil, spraying the entire jar with matte black paint, and then removing the lace to reveal a gorgeous, reverse-patterned glass design. Finish the look by wrapping a piece of rustic twine or black satin ribbon around the rim of the jar, and insert a battery-operated candle to cast moody, flickering shadows across your room.
4. Spooky Cardboard Tube Hanging Bats
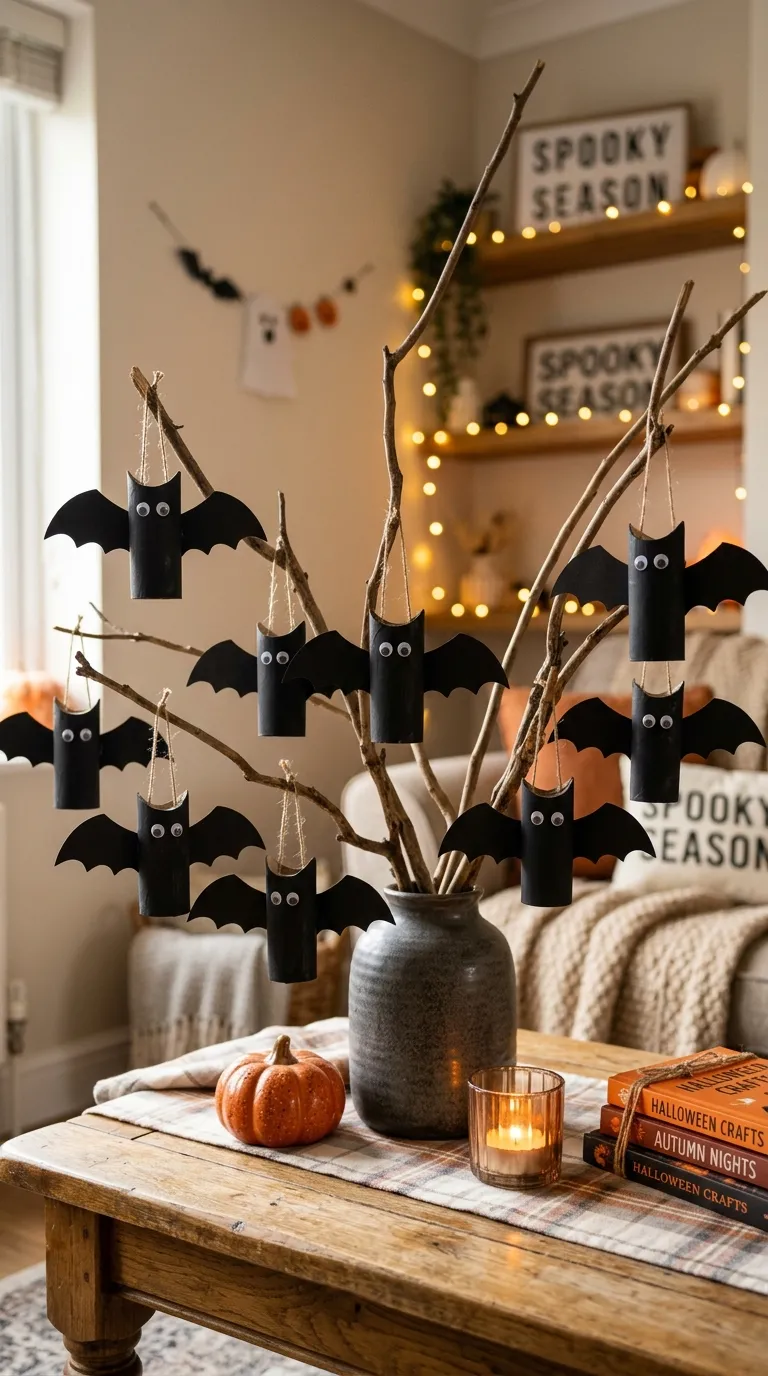
If you are looking for a fun, family-friendly craft that costs next to nothing, look no further than cardboard toilet paper or paper towel tubes. With a little black paint and some construction paper, these discarded items can be transformed into a swarm of spooky bats hanging from your light fixtures or ceilings. Gather your cardboard tubes, black acrylic paint, a paintbrush, black construction paper, googly eyes, craft glue, and scissors.
Begin by folding the top and bottom ends of the cardboard tube inward to form curved flaps; this instantly creates the illusion of pointed bat ears and feet. Paint the entire outer surface of the tube with matte black acrylic paint and let it dry completely. While the paint dries, fold a sheet of black construction paper in half and cut out symmetrical, scalloped bat wings. Glue the wings to the back of the painted tube. Add a pair of quirky googly eyes to the front, and use a white paint pen to draw tiny, sharp fangs. Thread a piece of dark string through the top fold to hang these playful creatures throughout your home.
5. Haunted Yard Packing Tape Ghosts
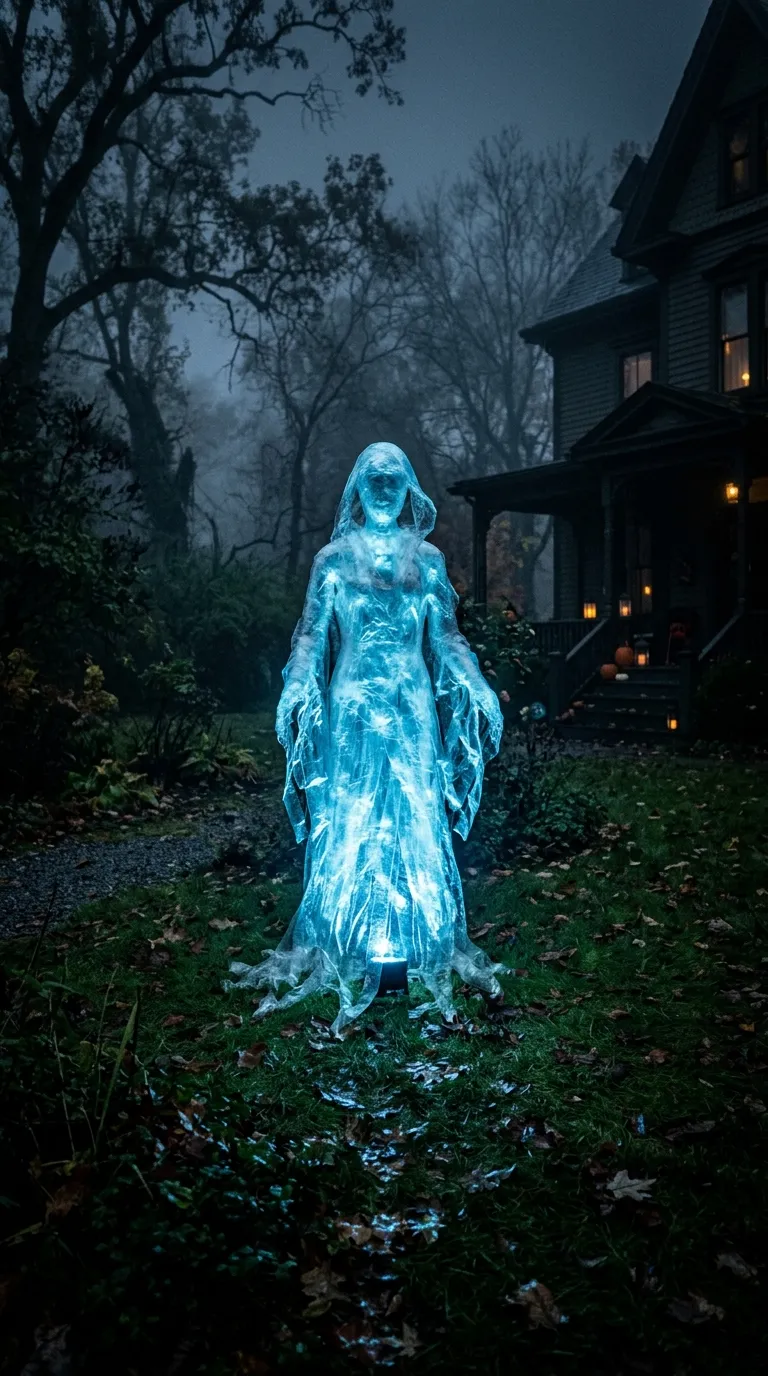
For a truly spectacular, life-sized outdoor decoration that will leave your neighbors in awe, try building a translucent, life-sized ghost using nothing but clear packing tape and plastic wrap. This clever technique allows you to mold a realistic human form that appears completely hollow and ethereal when placed on your lawn. You will need several rolls of heavy-duty clear packing tape, a roll of plastic wrap, scissors, and a willing volunteer or a mannequin torso to serve as your mold.
Wrap your volunteer’s torso (or a mannequin) in a protective layer of plastic wrap first, making sure it is not too tight. Next, wrap layers of clear packing tape over the plastic wrap, sticky side down, smoothing it out to capture the contours of the body. Apply three to four layers of tape to ensure the form is rigid and holds its shape. Carefully cut down the back of the form with safety scissors to release your volunteer, then tape the seam back together. Repeat this process for the head and arms if desired, and tape the pieces together. Secure your finished ghost to the ground with a garden stake and place a green or blue LED spotlight underneath to make it glow spectacularly in the dark.
6. Creepy Crawly Spiderweb Doormat
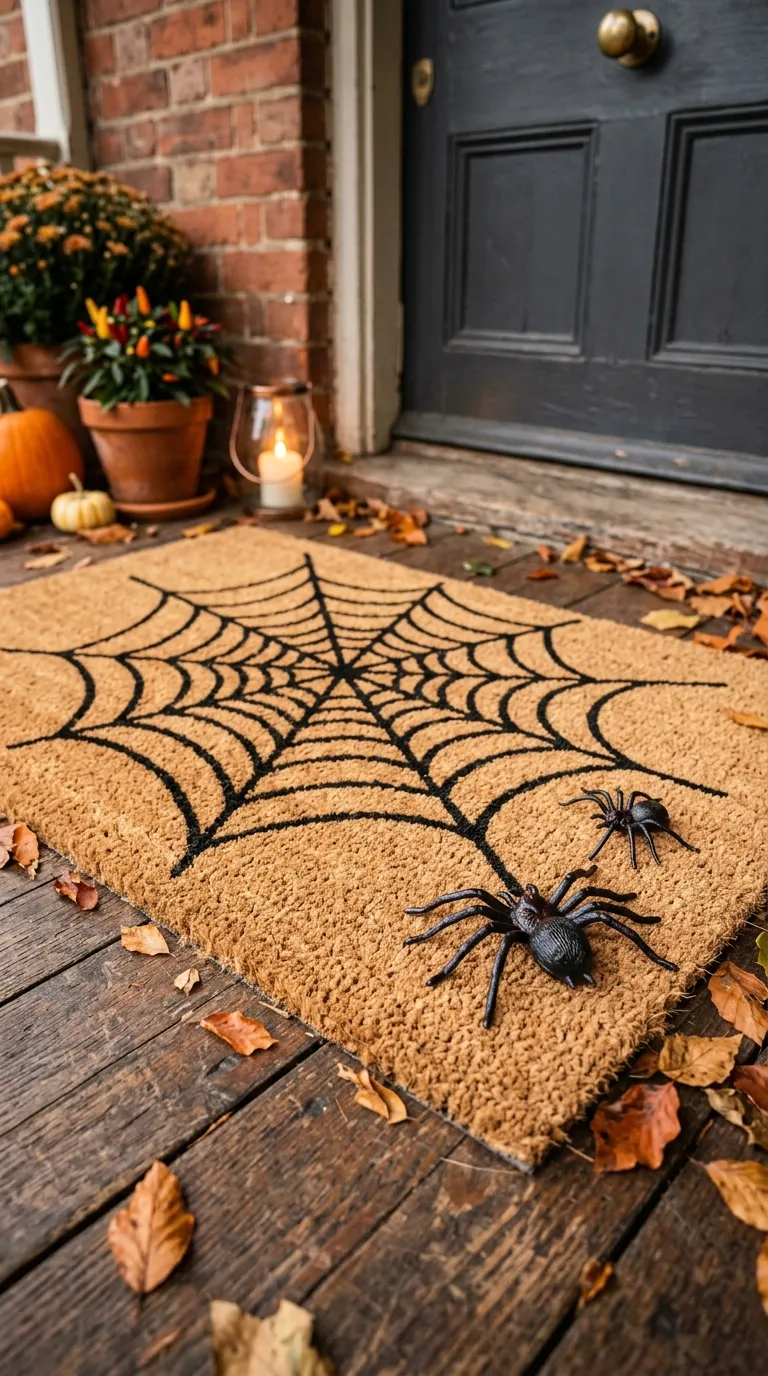
Give your guests a spine-chilling welcome before they even step through your front door with a customized, spiderweb-themed welcome mat. This budget-friendly DIY project utilizes a plain, inexpensive coir doormat, which you can easily find at home improvement or discount stores. To complete this craft, you will also need black outdoor acrylic paint or spray paint, a roll of painter’s tape, a paper plate, and a couple of plastic toy spiders.
To create the spiderweb pattern, start by placing a long strip of painter’s tape diagonally from one corner of the mat to the opposite corner. Repeat this with another strip to form a large “X.” Add a horizontal and a vertical strip intersecting directly in the center to create an eight-legged star pattern. Next, tear off shorter, curved pieces of tape to connect the spokes of the star, forming the concentric rings of the spiderweb. Once your tape stencil is secure, paint over the entire exposed coir area with black paint. Let it dry completely before peeling away the tape to reveal the clean, natural-colored web pattern. Hot glue a few oversized plastic spiders to the edge of the mat to finish the creepy effect.
7. Specimen Jar Creepy Curiosities
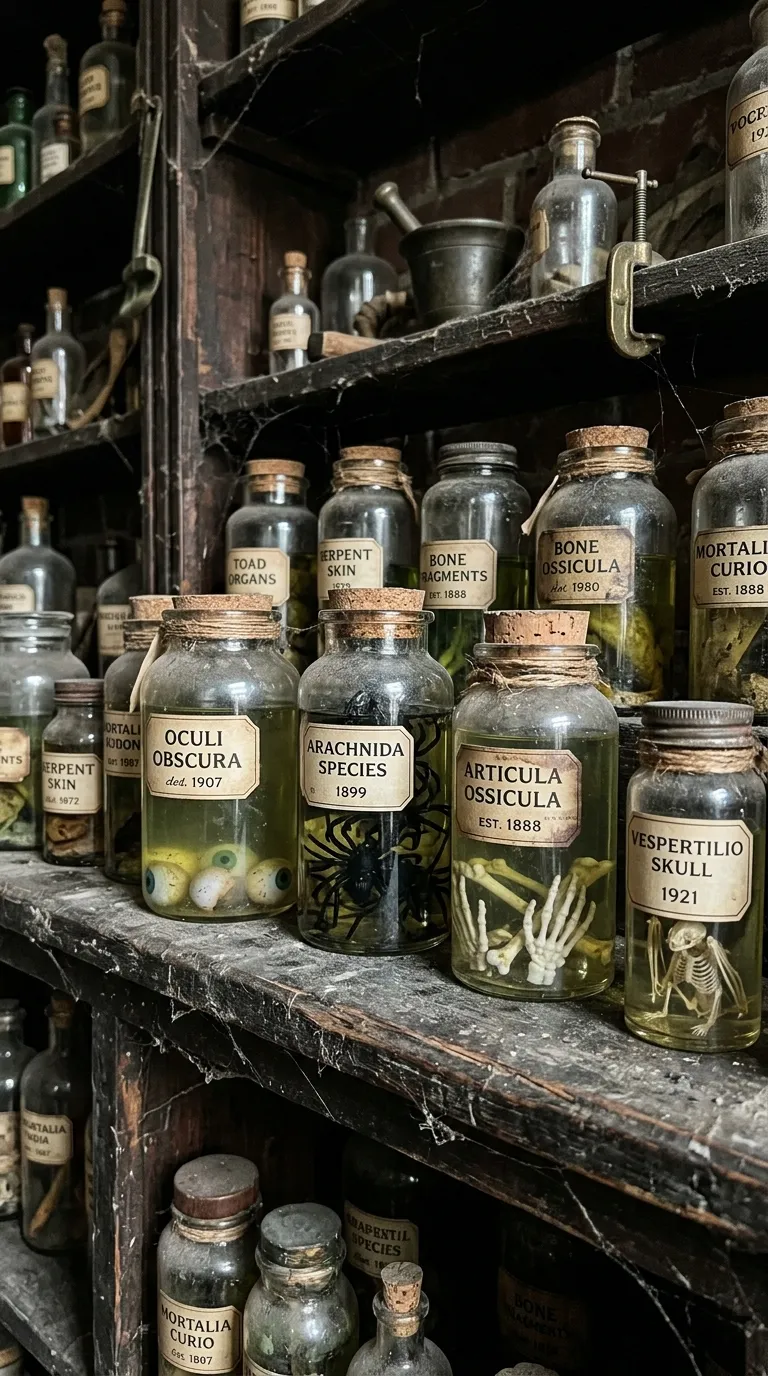
Channel your inner mad scientist by creating a shelf filled with unsettling, antique-style specimen jars. This project is perfect for decorating kitchen counters, bookshelves, or bathroom vanities. You can source various oddly shaped glass jars, bottles, and vases from thrift stores or dollar shops. You will also need water, food coloring (yellow, green, or red), and an assortment of creepy plastic items such as plastic bugs, fake eyeballs, skeleton hands, or faux internal organs.
Fill the jars with water and add a single drop of yellow and green food coloring to create a murky, aged preservative fluid appearance. Submerge your plastic items inside the jars; you can use a bit of hot glue to secure them to the bottom or let them float freely. To make the jars look authentic, print out vintage-style apothecary labels on regular paper, singe the edges carefully with a lighter to make them look old, and adhere them to the front of the glass using Mod Podge. Wrap the necks of the bottles with distressed jute twine or seal the corks with dripping black candle wax for a perfect, gothic finish.
8. Chic Trash Bag Giant Spiderwebs
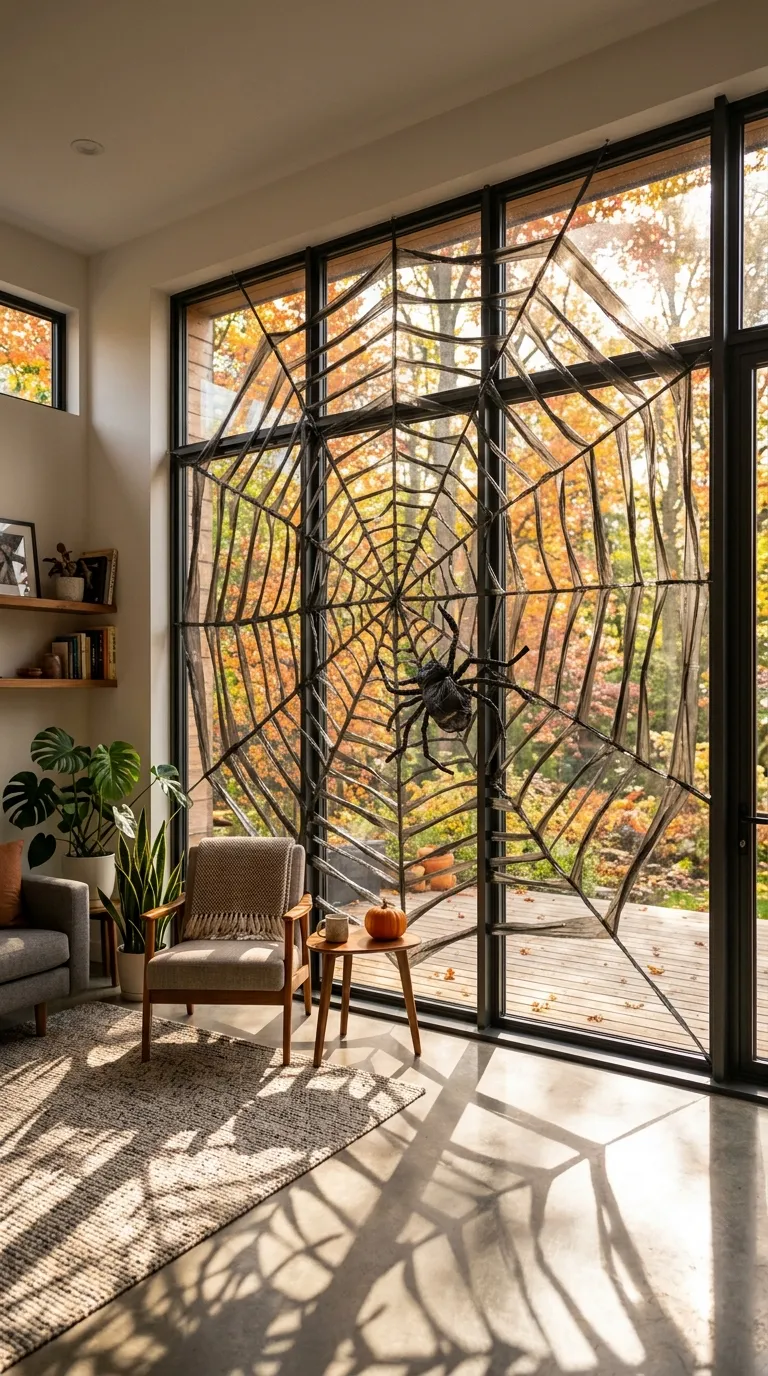
If you have large, blank walls or empty windows that need a dramatic decorative touch, you can easily create massive, intricate spiderwebs using ordinary black plastic trash bags. This ingenious method is based on the same concept as folding paper snowflakes, making it incredibly quick and highly cost-effective. You will need standard black plastic garbage bags, sharp scissors, and some double-sided tape or adhesive putty.
Start by cutting off the sealed bottom and side seams of a trash bag so you are left with a large, flat square of plastic. Fold the square diagonally to form a triangle, then fold it in half two more times, keeping the central point of the bag aligned. Use a white chalk pencil to sketch a series of curved, scalloped cutouts along the folded edges, leaving narrow strips intact to serve as the spokes of the web. Carefully cut along these lines with your scissors, unfold the plastic, and marvel at the giant, perfectly symmetrical spiderweb. Mount these lightweight webs to your walls, windows, or ceilings using small pieces of tape.
9. Bleeding Halloween Pillar Candles
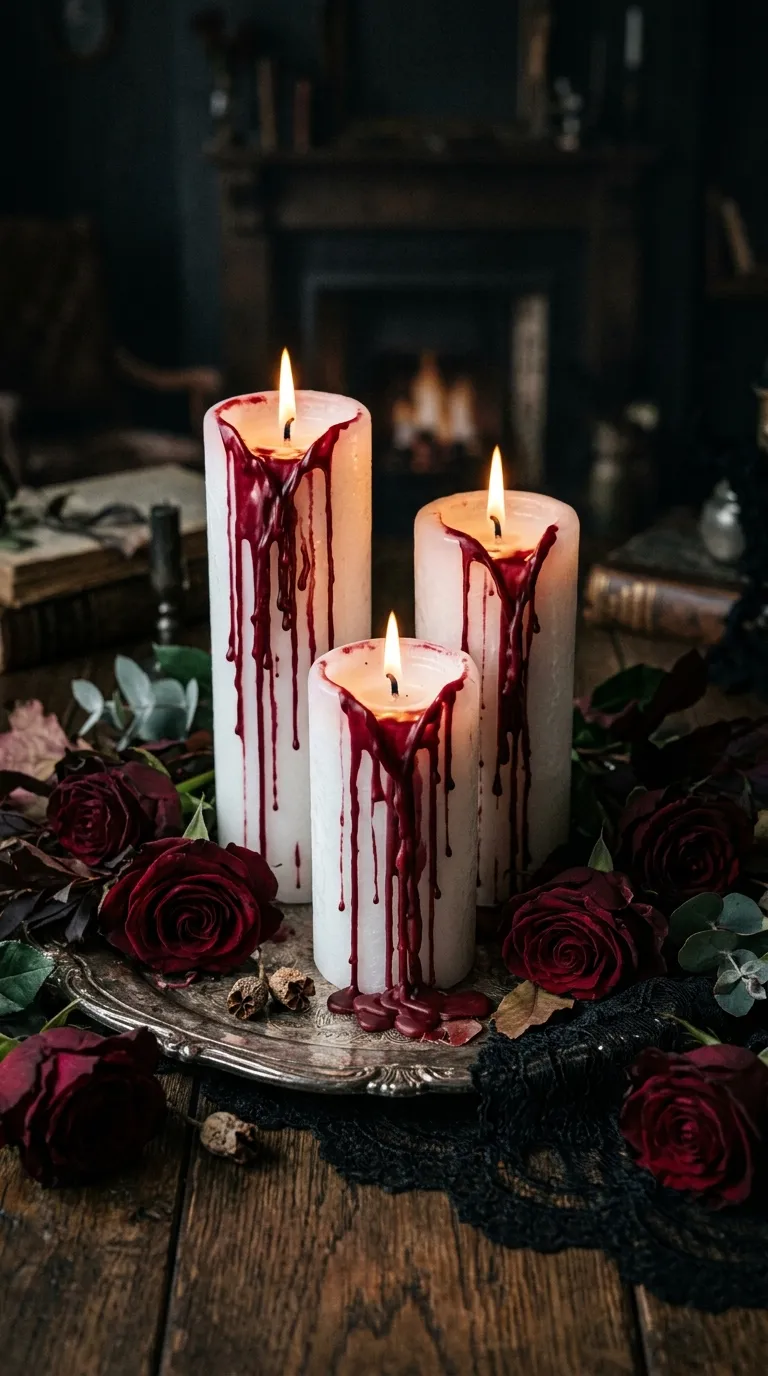
Add a touch of dramatic, gothic romance to your dinner table or mantelpiece with DIY bleeding pillar candles. This simple yet highly effective project transforms plain, inexpensive white pillar candles into dripping, macabre works of art. You will need a few thick white candles, one cheap red taper candle, a lighter or matches, and a protective sheet of newspaper or cardboard to catch any stray wax drips.
Place your white pillar candles on your protected work surface. Light the red taper candle and hold it at an angle directly over the top of the white candles. As the red wax melts, let it drip slowly around the edges of the white candles, allowing the red liquid to run down the sides in natural, uneven streams. Continue this process until you achieve a dramatic, blood-dripping effect. For safety, always make sure to use unscented candles if you plan to burn them during a dinner party, and never leave burning candles unattended. The contrast of the deep red wax against the stark white background creates an instantly spooky centerpiece.
10. Distressed Cheesecloth Wall Creep
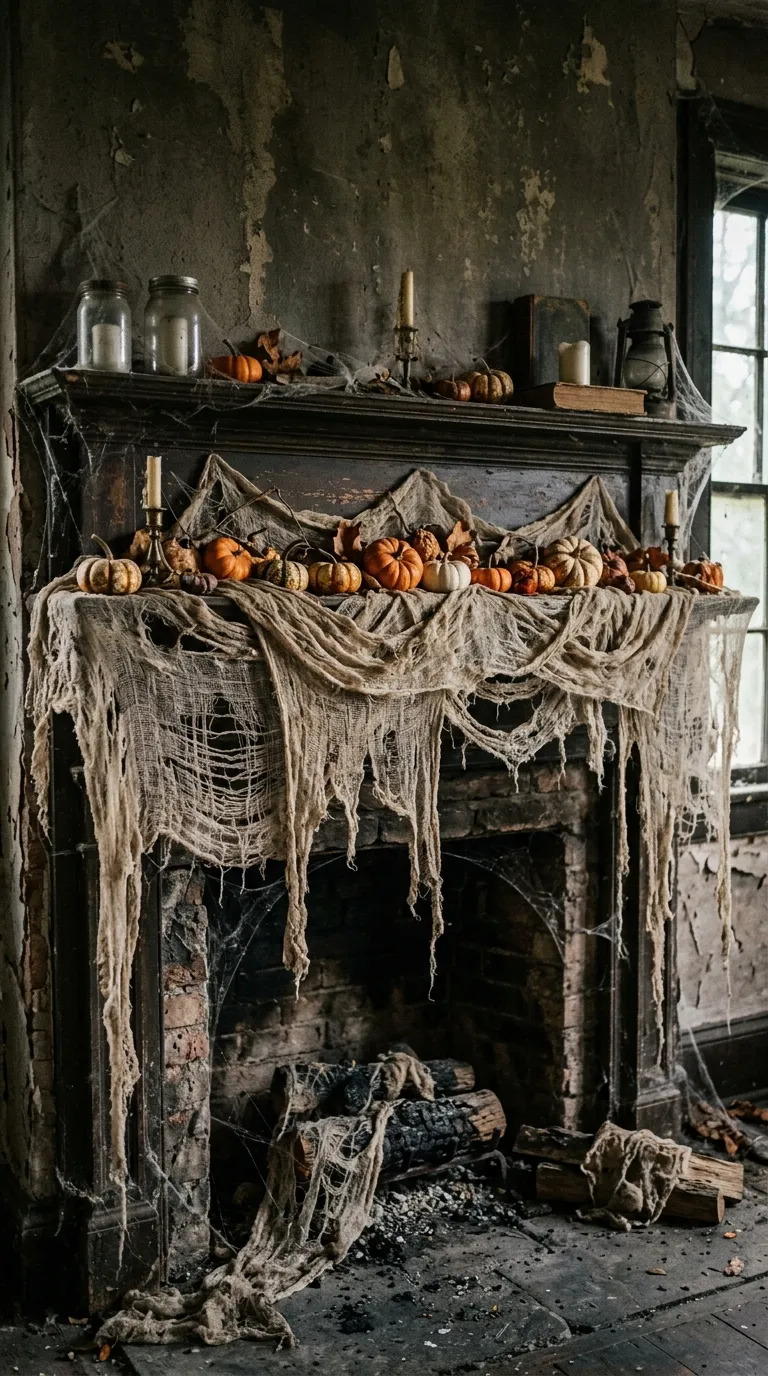
Cheesecloth is one of the most effective and affordable materials you can use to create a dusty, abandoned, and haunted atmosphere in any room. When properly distressed, it mimics the look of ancient, decaying cobwebs and tattered drapery. For this project, purchase several yards of inexpensive white cheesecloth, a bucket of warm water, a few black tea bags or instant coffee, scissors, and spray starch.
To give the cheesecloth an aged, dirty appearance, steep a few black tea bags or a spoonful of instant coffee in a bucket of warm water. Submerge the cheesecloth in the mixture for about ten minutes, then wring it out and let it dry; this will dye the fabric a perfect, vintage off-white shade. Once dry, use your scissors to cut small slits into the fabric, and use your hands to pull, stretch, and rip the fibers to create realistic-looking holes and tatters. Drape the distressed cloth over doorways, curtain rods, or your fireplace mantel. Mist it lightly with spray starch to help it hold its spooky, wind-blown shape throughout the entire Halloween season.
Conclusion
Decorating your home for Halloween does not require a massive financial investment or professional design skills. By focusing on creative repurposing, simple crafting techniques, and everyday materials, you can achieve a stunningly spooky aesthetic that is completely unique to your home. From floating witch hats to tattered cheesecloth drapery, these ten easy DIY projects prove that budget-friendly decorating can be both incredibly fun and highly impactful. Gather your supplies, unleash your inner artist, and enjoy the process of bringing your personal haunted vision to life this autumn season.